 Studio
Choose a mockup
Your generated image will be placed directly into the selected mockup.
Tip: you can also use just a reference image (no prompt) — AI will integrate it into the chosen mockup.
How does it work?
Upload your image
Click on "Choose an image" or drag and drop your file. Accepted formats: JPG, PNG, WEBP.
Choose a mode
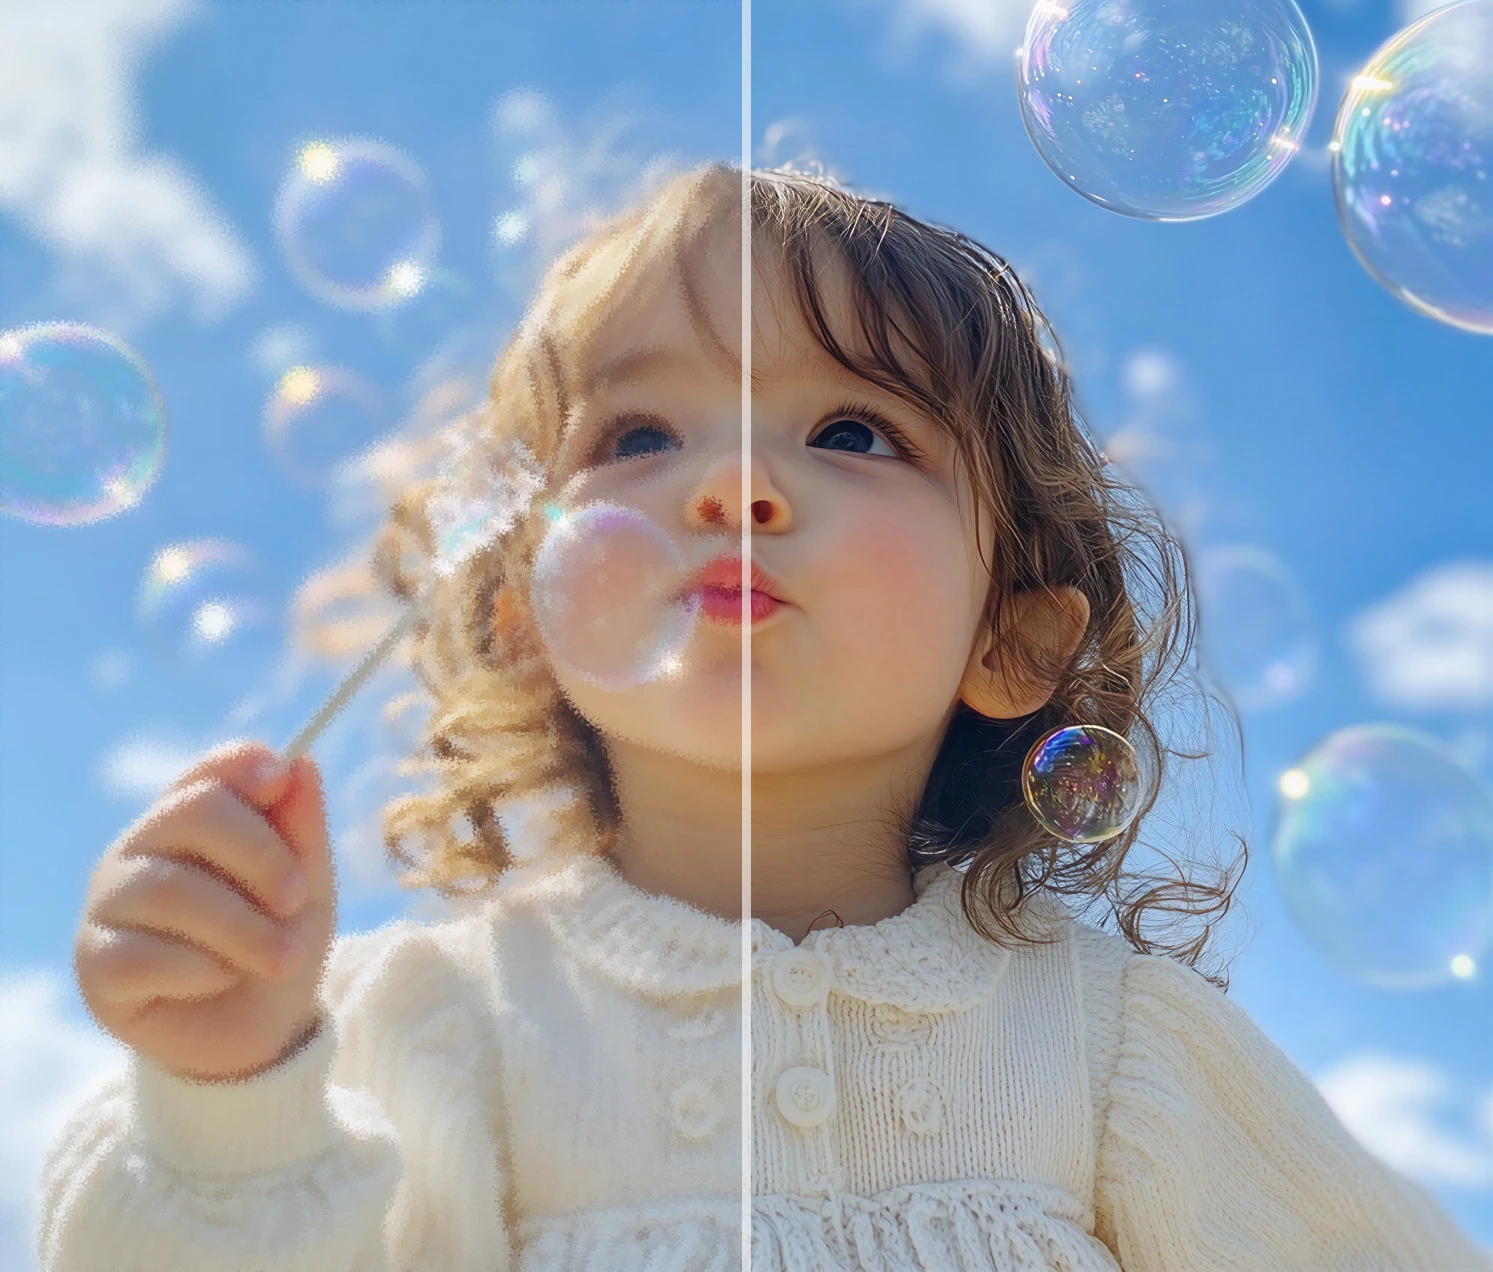
Pick the enhancement mode that fits your image: Upscale for top quality, Smooth for a balanced result.
Run the enhancement
Click on "Enhance image". The AI will analyze and optimize your image in seconds.
Download the result
Compare before/after with the slider, then download your enhanced image in high quality. You can also crop and adjust the image to preset print formats (A4, 8×10", 16×20", etc.).
How to create an image?

Describe your image
Write a prompt describing the image you want. You can also add a reference image to guide the AI. The prompt, reference image and mockup are all optional — you just need at least one of them.
Customize (optional)
Pick a theme (watercolor, pop art, neon…), a format (square, portrait, landscape) and a mockup to visualize your creation in a frame. All these options are optional.
Generate
Click "Create image". The AI generates your visual in seconds. Each generation costs 1 credit.
Download the result
Get your image, switch to the Enhance tab to boost its quality, or click Retouch to edit it.